/ Home
Windows Basic Setup / Windows Orientation
Install Browser
- Install Brave browser do not use the chrome
join slack
- first join the slack using the invite link.
- Use your email and login
Install Git SCM
- go to this link and download it Git SCM
- Choose according to your OS
- Once installed open the installed file and finish the basic setup
Setup SSH key in Github
- once you setup the gitbash open the git bash and do the following steps
- paste the following commands on gitbash
git config --global user.name "Your Name"
git config --global user.email "your.email@example.com"
- instead of “Your Name” and “your.email@example.com” replace with your github user name and email
- after this use the below commands
ssh-keygen -t rsa -b 4096 -C "your_email@example.com"

eval $(ssh-agent -s)

ssh-add ~/.ssh/id_rsa

cat ~/.ssh/id_rsa.pub
- in this also replace with your email for the first command
- once you enter the first command keep on pressing the enter
- after that paste the next commands one by one
- once you enter the last command you will get ssh key as a result copy the key and store it in the txt file
paste the ssh key in the github
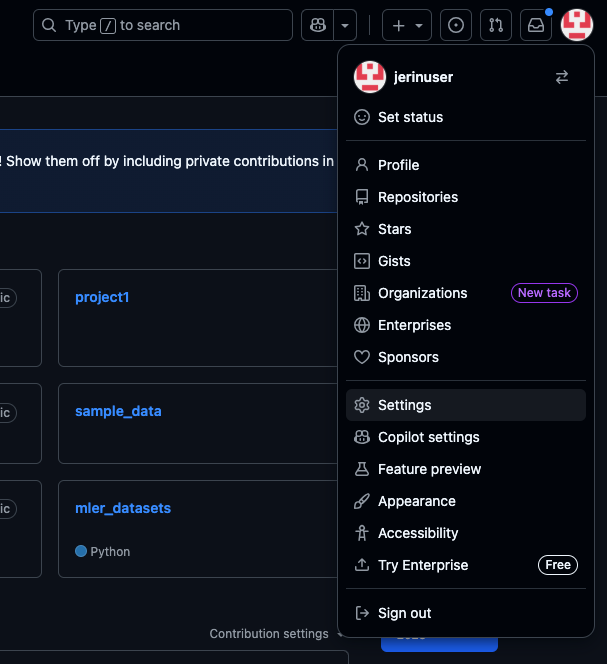
- Go to github and click on your profile in the right side and choose settings
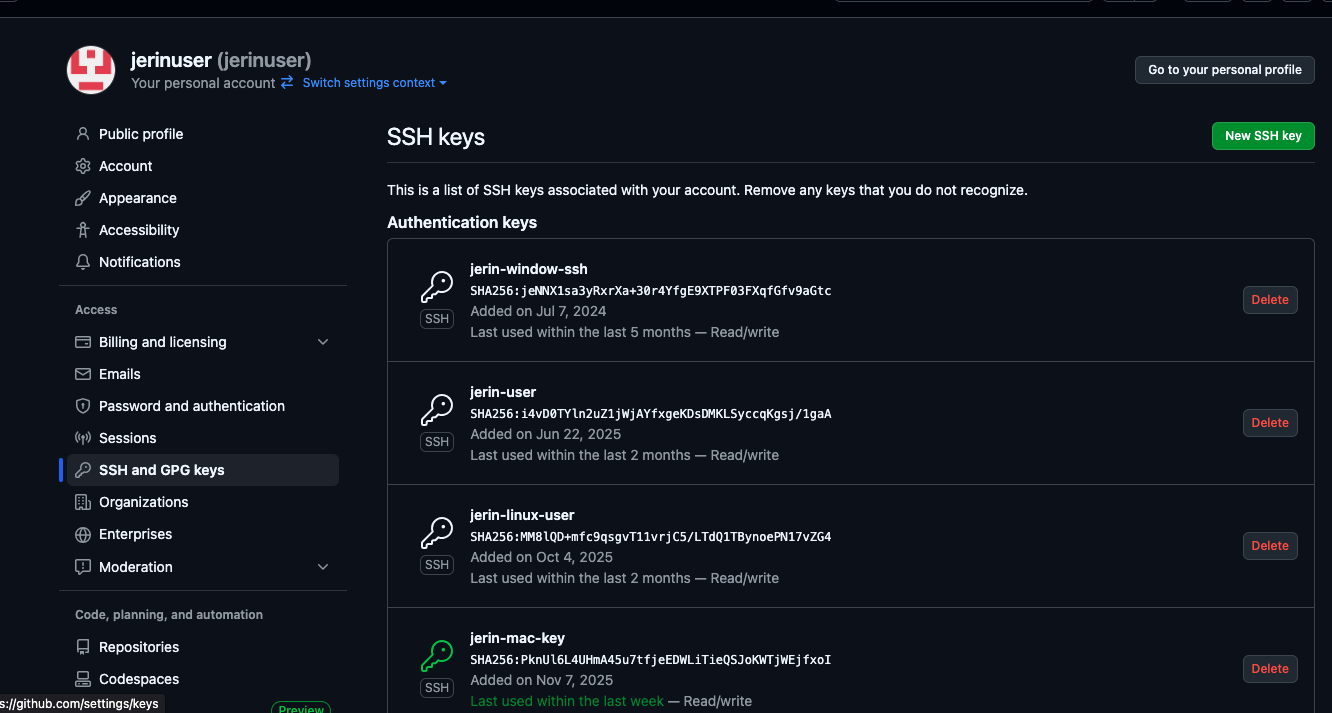
- Once you click on the settings choose SSH and GPG Keys option in the left menu
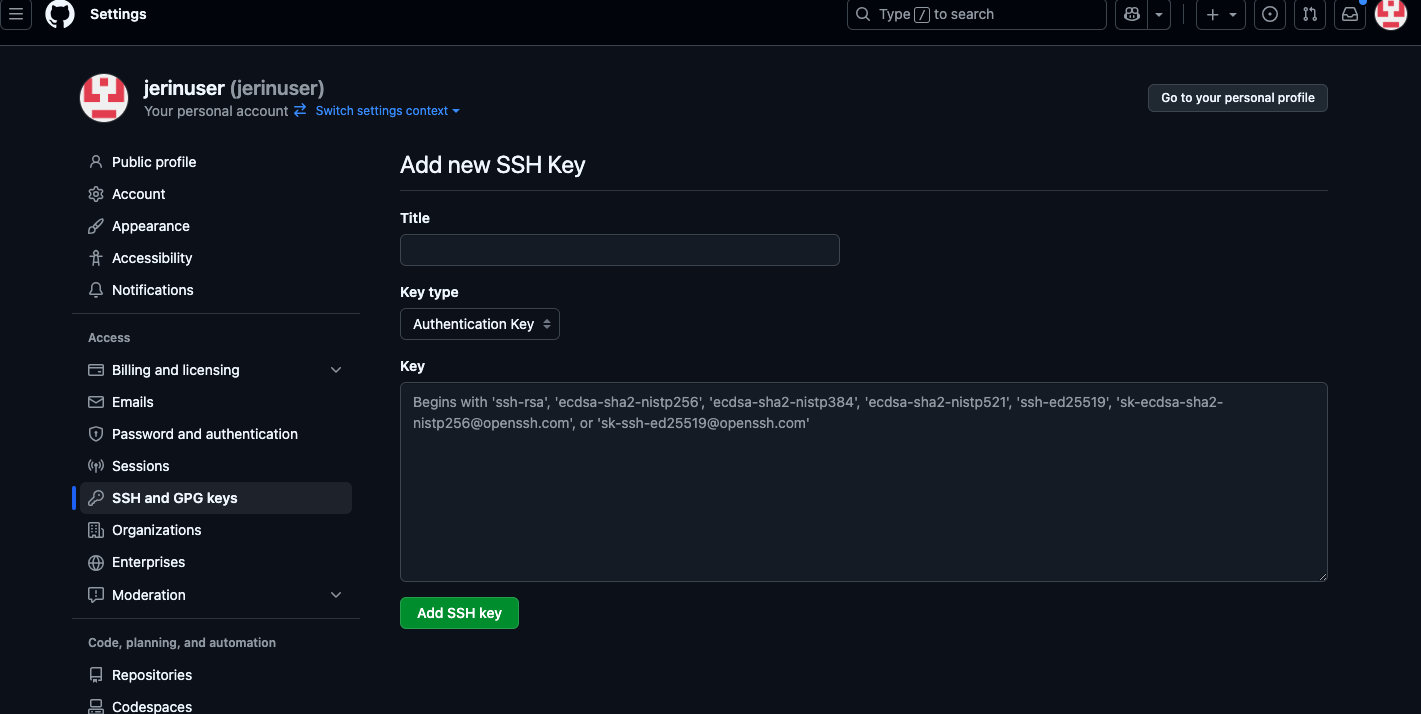
- after clicking on it give a title for your key and paste your ssh key in the respective fields
Before
After
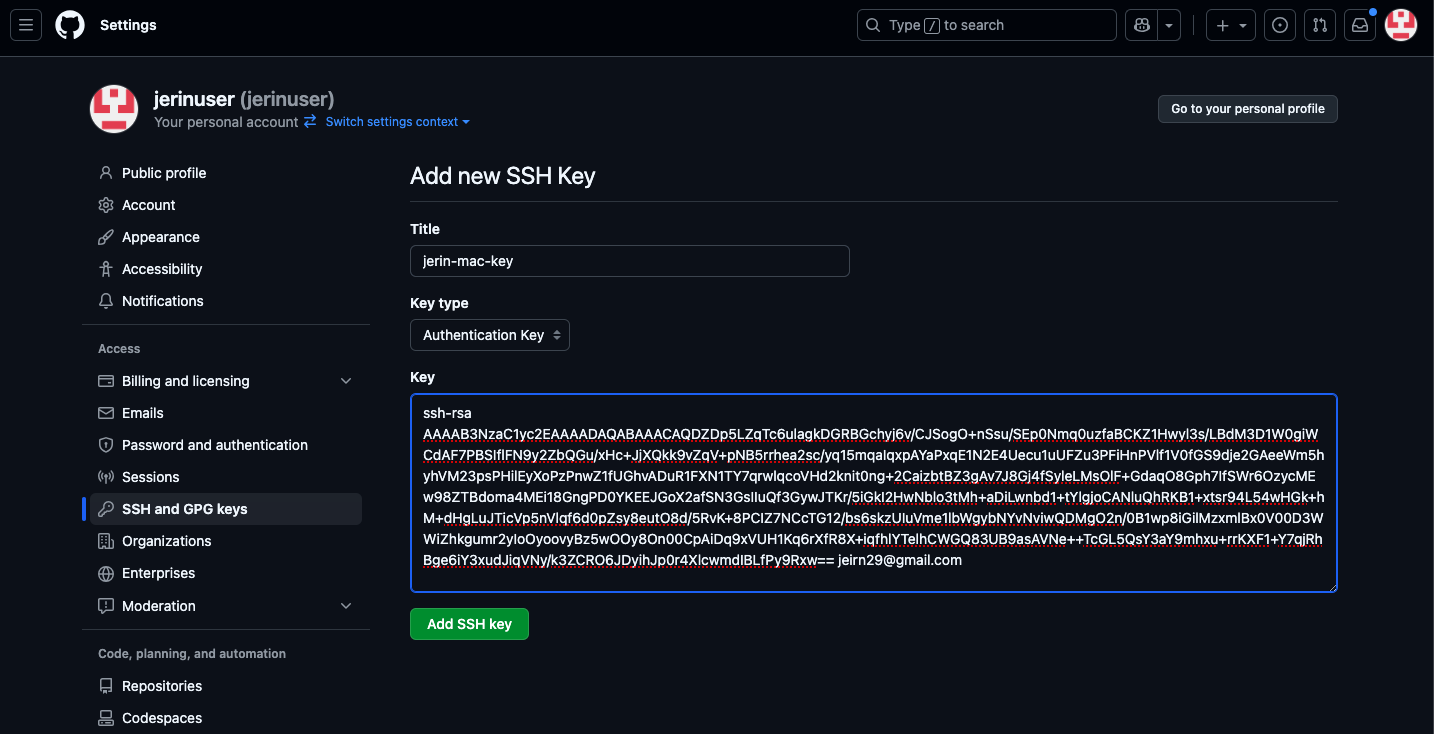
- After you done all these step click on add SSH key
That’s you are done with the SSH key setup now you can start working with the github repo
Note
All the github related work like git pull and git clone works only on the gitbash.(you can not do that in the in the normal terminal so make sure you are doing the things correctly)
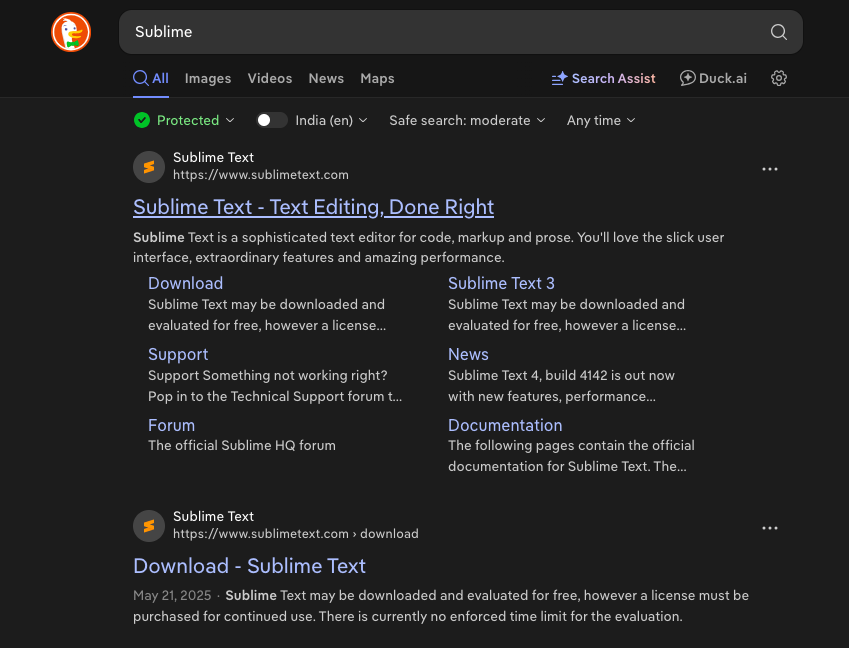
Install Sublime
- search for Sublime in the browser and dowload it
- Once you dowload open the sublime and create a file called “dl-yourname.txt” sample “dl-jerin.txt”
- you have to store your daily logs in it use the format that is given below do not change the format
--------------------------------------------------
Day # 1 - Oct 12, 2025 - Tuesday
------------------------------------------


------------------------
- sample
-------------------------------------------------------------------------------------------------------------------
Day # 313 September 9 2025 - Sunday
2025-11-09 10:00:46
---------------------------------------

LangChain vs LangGraph
https://www.youtube.com/watch?v=vmy3HgaKJsY

LangGraph Core Concepts
https://www.youtube.com/watch?v=D5KhiCDM9XQ

https://www.youtube.com/watch?v=CnXdddeZ4tQ
https://www.youtube.com/watch?v=qaWOwbFw3cs


https://jerins-organization.gitbook.io/my-learnings/


Generative AI vs Agentic AI
What is Agentic AI
LangChain vs LangGraph
LangGraph Core Concepts
Sequential Workflows in LangGraph
Parallel Workflows in LangGraph
Conditional Workflows in LangGraph
Iterative Workflows in LangGraph
How to Build a Chatbot using LangGraph
Persistence in LangGraph | Time Travel in LangGraph
Building a Chatbot with UI in LangGraph & Streamlit
Streaming in LangGraph – Implementing real-time streaming workflows
How to Build a Resume Chat Feature like ChatGPT
LangGraph + SQLite – Chatbot with Database Integration
LangSmith Crash Course – LangSmith tutorial and observability in GenAI
Observability in LangGraph – LangSmith integration for monitoring workflows
Tools in LangGraph – Tool use and orchestration in LangGraph


----------------------------------------/
- Create another file as logs.txt and store your effort logs in it
- logs.txt file sample
Jerin
November 07
Task 1: basic setup                         - L2 - Success - 10:00 - 12:00
Task 2: Langchain notes          			- L2 - Success - 12:00 - 14:00
Task 3: kactii-hustlecamp-learning          - L2 - Success - 15:00 - 16:30
Task 4: kactii-hustlecamp-learning          - L2 - Failure - 16:30 - 18:30
Task 5: query performed in vercel deploment - L3 - Success - 18:30 - 21:30

Total Hours: 10 Hours

--------------------------------------------------------------------------
Note
In your daily you have to keep the task details and any meeting notes and resources and any references you are collecting while working but in the logs.txt you have to maintain only the Task Details
- Create one more file and as error-archive.txt and store the errors you get while working
Install VSCode
- Download VSCode VSCode
- And download the extensions from the following link Extensions
Install miniconda
- Click this link and download miniconda miniconda
- once you download do the normal setup for the application and open it.
- And after that enter the below commands in the anaconda prompt
conda create --name py312 python=3.12
- The above command used to create a python 12 environment
- Use the “code” command in the anaconda prompt to open VSCode
Install kiro
- download kiro kiro
Worksheet
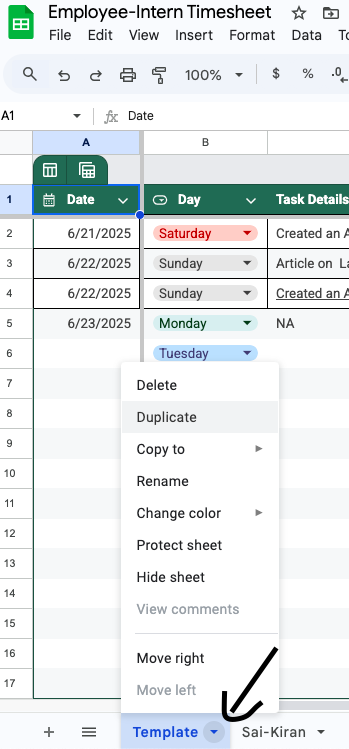
- everyday before you leave make sure to update the worksheet
- Worksheet link Worksheet
- Duplicate the template sheet and rename it with your name like in the sample image i gave
- Get access from your mentor for the link
Pynotes setup
- click on the following link and go to the repository Link
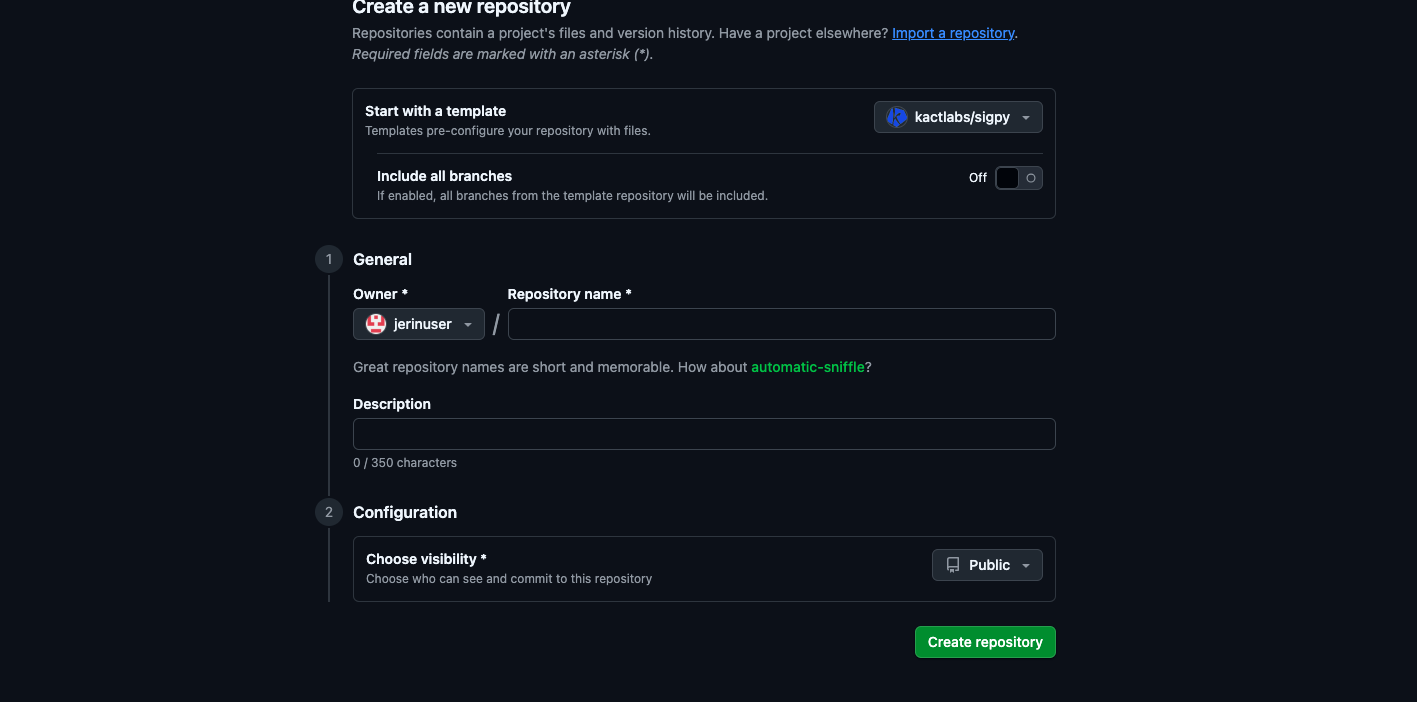
- Once you go to the link choose the “Use this template” button and click on “create new repository”
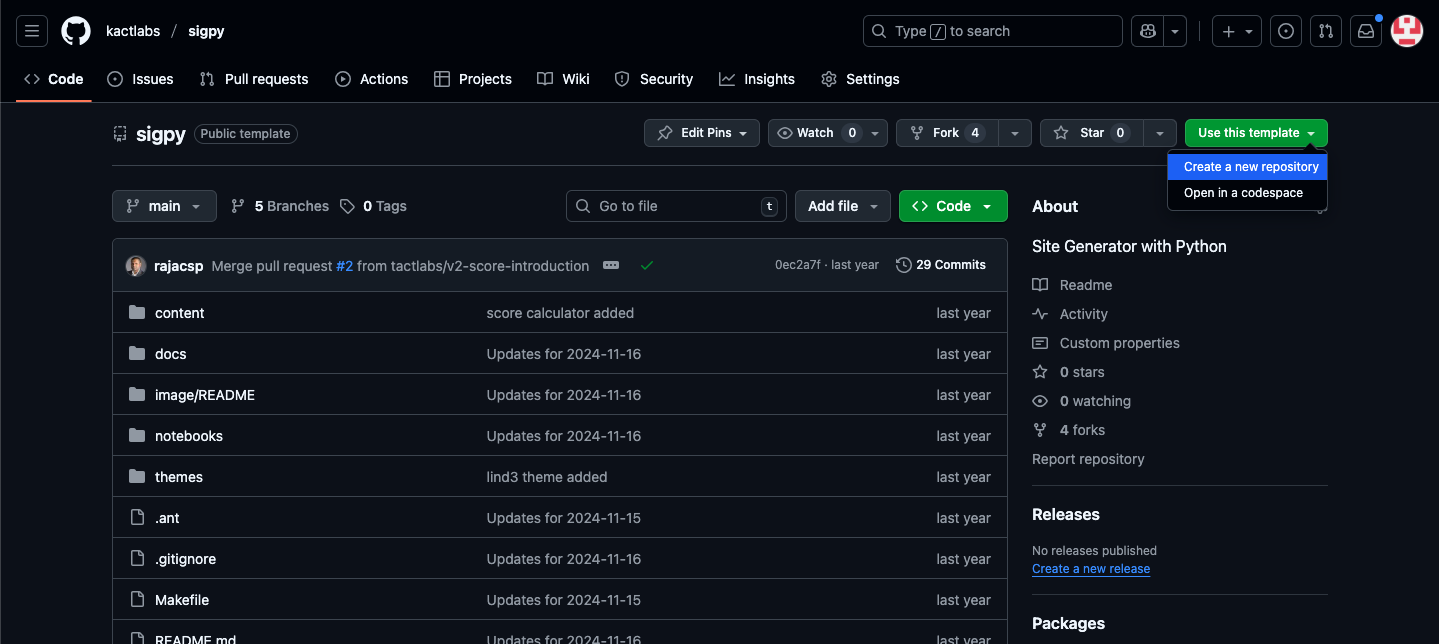
- Name the repository as “pynotes” and click on create repository
- Once you created it click on the code button and copy the ssh link
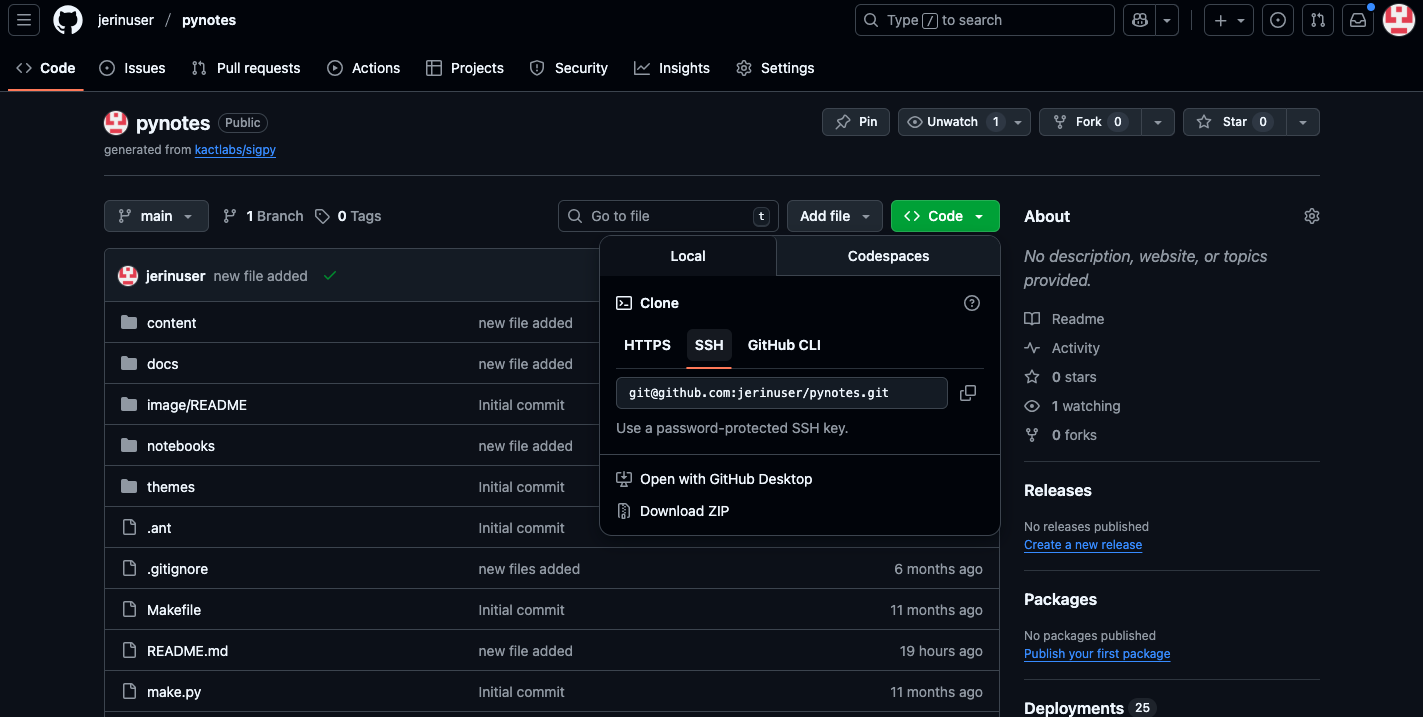
- once you copy the ssh link open your gitbash and make the directory as kact if not following is the command to create a kact directory
- Once create directory move to that kact directory
mkdir kact

cd kact
- i have added the images for your reference


- once you copy the ssh link clone it in the kact folder like in the sample image i gave

- once you clone it give “cd pynotes” command and open pynotes in vscode using “code .” command
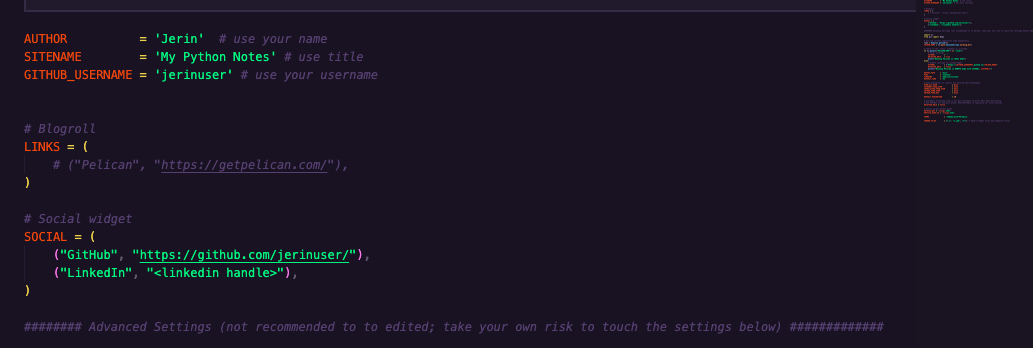
- go to pelicanconfig.py and change the below details for your reference i have added the image.
AUTHOR          = 'Your name'  # use your name
SITENAME        = 'My Python Notes' # use title
GITHUB_USERNAME = 'github username' # use your username


# Blogroll
LINKS = (
    # ("Pelican", "https://getpelican.com/"),
)

# Social widget
SOCIAL = (
    ("GitHub", "https://github.com/username/"),
    ("LinkedIn", "<linkedin handle>"),
)
- Once you are done with it open your anaconda prompt and activate python==12
conda activate py312
- And install the requirements file
pip install -r requirements.txt
- go to your pynotes repository on github and click on the settings option
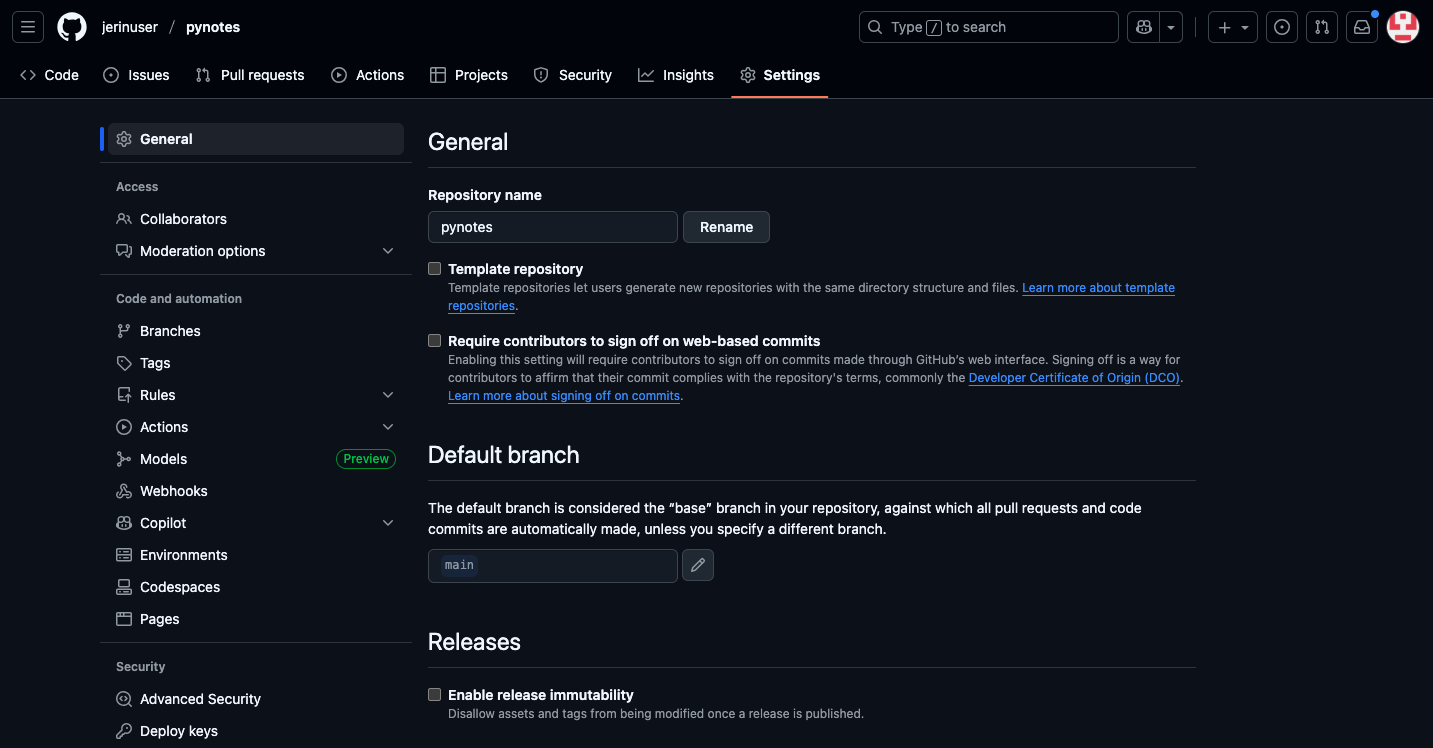
- And click on the pages in the left menu and it change the build and deployment section as show in the image
- next step is to use the following command
- use these commands in anaconda prompt
python make.py

pelican content
- use these commands in the git bash
git add .

git commit -m "my first pyotes commit"

git push
- than go to your gitub repository and go to action section and click on “Pages build and deployment”
- after clicking on the pages build and deploymeny clikc on the deploy link
- after clicking the link you will see this page click the archives in the right side menu there you view your pynotes score

- if your not able to see the page as shown in the image try adding one “ipynb” file in the notebook folder and add simple python code and commit it in the github
steps to create and commit and commit the file in the github
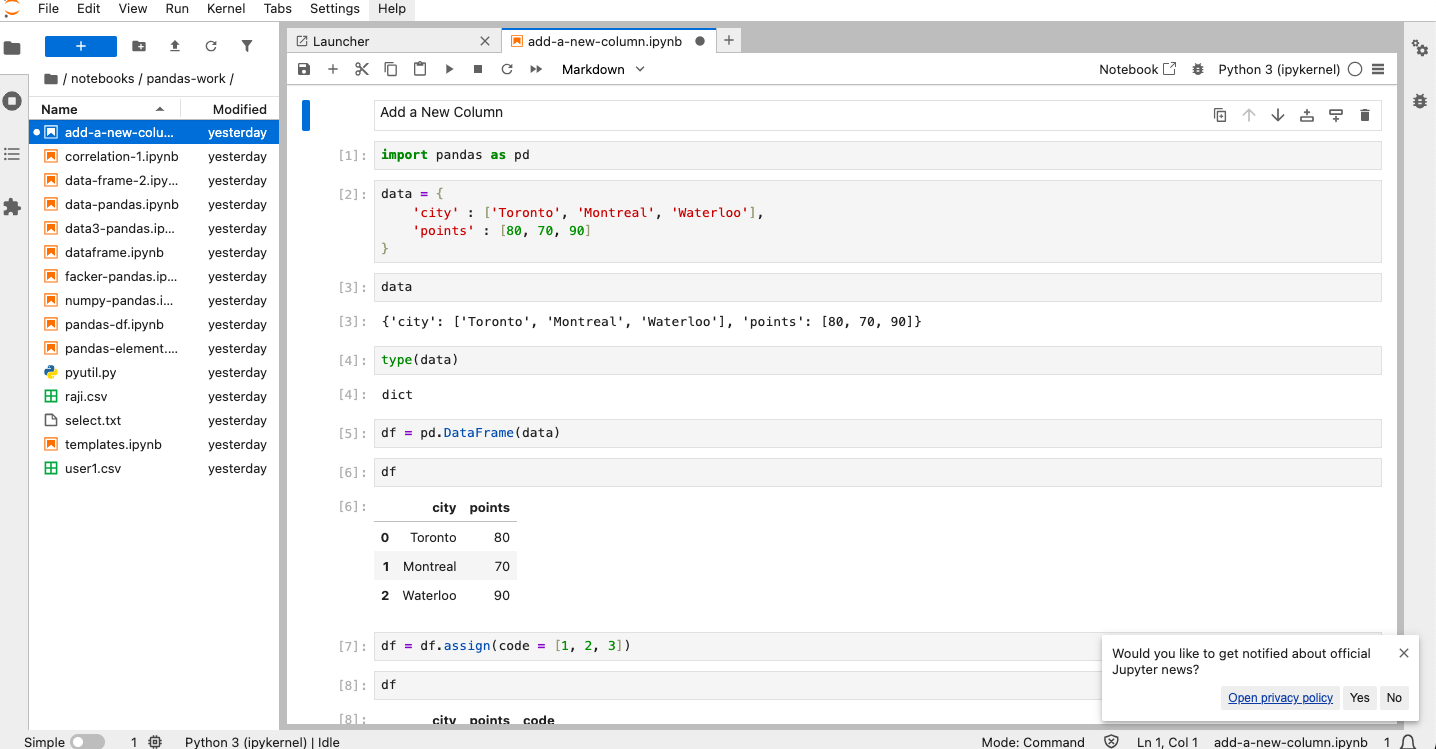
- open pynotes in jupyter lab use the following command
jupyter lab

- you will see the page like this in image click on the notebooks folder in the left menu

- after clicking it choose existing folder create a new one

- and start creating the “ipynb” file
- once created stat adding the python code in it
- once you are done wi the above steps you must do the following five commands.
- first two commands in your anaconda prompt and another 3 commands in your git bash
python make.py

pelican content

git add .

git commit -m "new files added"

git push
- you can add your own commands in the git commit message
git commit -m "your own message"
- after you could able to see the normal image i shown above
Set 2:
Github

Gitbook

Miniconda with env called "py312" (version python 3.12)

Kaggle

Git bash

Generate and copy .ssh to GitHub

Create a github repo called "test"
	create a file called "one.py"
		add one line
			print("hellow")

		run with py312 environment

		push the changes

		it should be similar to https://github.com/rajasgs/test

Create daily logs github repo (private)

Jupyter Lab

Download titanic dataset in Kaggle and keep it under c:/<username>/kact/datasets/
Set 3:
Brave

Slack

Sublime

Git SCM
  https://git-scm.com/install/windows

GitHub Account
  - name should not have any numbers
  - first_name, last_name
    - example: sandhyarajkumar

SSH Key

daily-logs Repo
	dl-<name>.txt
	error-archive.txt

Miniconda

VSCode
	Cline
	Roo Code

Docker

Kiro

GitBook
  URL: https://<username>.gitbook.io/
  Example: https://csp.gitbook.io/

  mylearning
    URL: https://<username>.gitbook.io/mylearning
    Example: https://csp.gitbook.io/mylearning

PyNotes

Substack

Kactii
  Sign up with referral
  Reverser agent

Kactii Link Bank